Github 与 Hexo 搭建博客步骤(使用 Next 主题)

1. 安装前的准备

Hexo 是一个快速简单并且强大的博客框架,使用者可以使用 markdown 语法编写文章,然后通过 hexo 生成带有主题的静态文件,并上传到 github,生成的 html 文件可以在浏览器上访问。本安装教程是在 ubuntu 平台上进行的,其他平台请另寻他处。
安装前 Hexo 前需要先安装 Node.js 和 Git,在后面会描述其安装过程。

2. 安装 Git

使用如下命令安装 Git,在这之后可以先了解 git 简单命令的使用,推荐:廖雪峰的Git教程

1
$ sudo apt-get install git-core

3. 安装 Node.js

我们可以使用 nvm 来安装 Node.js ,方法如下:

1
curl https://raw.githubusercontent.com/creationix/nvm/master/install.sh | sh


1
$ wget -qO- https://raw.githubusercontent.com/creationix/nvm/master/install.sh | sh

安装完 nvm 之后重启窗口安装 Node.js:

1
$ nvm install stable

如果不想使用命令安装可以直接下载 Node.js 的安装包安装。
下载完 linux 下的压缩包后,将其复制到 /usr/local 目录下,并使用 tar -xvJf + 文件名,对压缩包进行解压,更改解压后的文件夹的权限为755。
修改环境变量,使用 vim 修改 /etc/profile,在文件末尾添加两行:

1
2
3
# node.js
export NODE=/usr/local/node-v6.9.1-linux-x64
export PATH=${NODE}/bin:$PATH

之后执行命令 source /etc/profile,使用 node -v 命令查看版本号。

4. 安装 Hexo

使用 npm 安装 hexo:

1
2
3
4
$ sudo apt-get install npm
$ sudo apt-get update
$ sudo apt-get install nodejs-legacy
$ sudo npm install -g hexo-cli

经过一段时间的等待,会在终端显示如下树状结果,hexo 安装完毕。

after_install_hexo

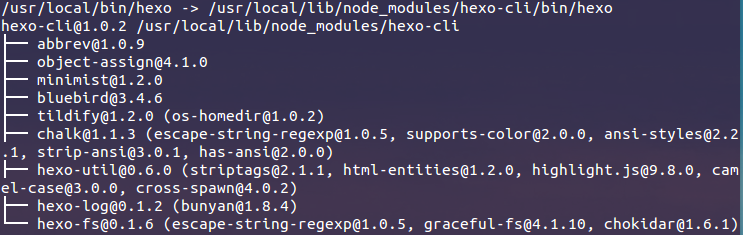
当 hexo 安装完毕,使用如下命令初始化 hexo 目录并安装依赖,生成的目录在当前所在的目录之下。

1
2
3
$ hexo init <folder> # 初始化 hexo 并创建目录
$ cd <folder> # 切换到目录之下
$ npm install # 安装依赖包

hexo 常用命令:

1
2
3
4
$ hexo g #完整命令为hexo generate,用于生成静态文件
$ hexo s #完整命令为hexo server,用于启动服务器,主要用来本地预览
$ hexo d #完整命令为hexo deploy,用于将本地文件发布到github上
$ hexo n #完整命令为hexo new,用于新建一篇文章

在本地开启博客,用浏览器访问 http://localhost:4000/:

1
2
$ hexo g
$ hexo s

5. 注册 Github 并创建 repository

Github 官网注册 Github 账号,登录进入个人主页选择 Repositories,再点击旁边的 NEW 按钮创建新的 repository,名字的格式必须为 name.github.io,例如:windows7lake.github.io。

create_repository

6. hexo 的配置

整个博客的配置文件,位于 hexo\_config.yml,通过它,我们可以对整个博客进行配置。

1
2
3
4
5
6
7
8
9
10
11
12
13
14
15
16
17
18
19
20
21
22
23
24
25
26
27
28
29
30
31
32
33
34
35
36
37
38
39
40
41
42
43
44
45
46
47
48
49
50
51
52
53
54
55
56
57
58
59
60
61
62
63
64
65
66
67
68
69
70
71
72
73
74
# Hexo Configuration
## Docs: https://hexo.io/docs/configuration.html
## Source: https://github.com/hexojs/hexo/
# Site
title: Lio's Blog # 网站即博客的标题
subtitle: No pains no gains! # 博客的副标题
description: No pains no gains, Believes oneself, Nothing impossible! # 博客的描述
author: Lio Lin # 作者
language: zh-CN # 语言
timezone:
# URL 设置自己的域名
## If your site is put in a subdirectory,
## set url as 'http://yoursite.com/child' and root as '/child/'
url: http://yoursite.com
root: /
permalink: :year/:month/:day/:title/
permalink_defaults:
# Directory
source_dir: source
public_dir: public
tag_dir: tags
archive_dir: archives
category_dir: categories
code_dir: downloads/code
i18n_dir: :lang
skip_render:
# Writing
new_post_name: :title.md # 新创建的文章的默认文件名
default_layout: post
titlecase: false # 将标题转换为标题大小写
external_link: true # 在新的标签中打开外部连接
filename_case: 0 # 0 为默认; 1 为小写; 2 为大写
render_drafts: false # 是否显示草稿
post_asset_folder: false
relative_link: false # 是否创建相对于根文件夹的链接
future: true
highlight: # 代码块设置
enable: true
line_number: true
auto_detect: false
tab_replace:
# Category & Tag
default_category: uncategorized
category_map:
tag_map:
# Date / Time format 时间格式
## Hexo uses Moment.js to parse and display date
## You can customize the date format as defined in
## http://momentjs.com/docs/#/displaying/format/
date_format: YYYY-MM-DD
time_format: HH:mm:ss
# Pagination
## Set per_page to 0 to disable pagination
per_page: 10 # 每页显示的文章数,0 表示不分页
pagination_dir: page # 分页目录
# Extensions
## Plugins: https://hexo.io/plugins/
## Themes: https://hexo.io/themes/
theme: landscape # 主题名
# Deployment 部署到 github 的配置
## Docs: https://hexo.io/docs/deployment.html
deploy:
type: git
repository: https://github.com/windows7lake/windows7lake.github.io
branch: master

使用如下命令克隆 Next 主题到我们的本地博客之下:

1
2
$ cd your-hexo-site
$ git clone https://github.com/iissnan/hexo-theme-next themes/next

主题的配置文件,位于 hexo\theme\主题名\_config.yml,对主题的设置。
这里对主题的配置可以参考 NexT 官网。

7. 将本地 Hexo 发布到 Github

在本地创建 ssh key:

1
$ ssh-keygen -t rsa -C "your_email@youremail.com"

后面的 your_email@youremail.com 改为自己的邮箱,之后会要求确认路径和输入密码,一路回车就行。成功的话会在 ~/ 下生成 .ssh 文件夹,进去,打开 id_rsa.pub,复制里面的 key。

回到 github,进入 Settings,选择 SSH and GPG Keys -> New SSH Key,title 随便填,粘贴 key。为了验证是否成功,输入:

1
$ ssh -T git@github.com

如果是第一次的会提示是否 continue,输入 yes 就会看到:You’ve successfully authenticated, but GitHub does not provide shell access ,这就表示已成功连上 github。

接下来我们要做的就是把本地仓库传到 github 上去,在此之前还需要设置 username 和 email,因为 github 每次 commit 都会记录他们。

1
2
$ git config --global user.name "your name"
$ git config --global user.email "your_email@youremail.com"

发布本地博客内容到 Github,需切换到博客目录下,执行如下两条命令,执行如下的第二个命令,可能会要你输入用户名和密码,皆为注册 Github 时的数据,输入密码是不显示任何东西的,输入完毕回车即可。

1
2
$ hexo g
$ hexo d

如果输入 hexo d 后遇到 ERROR Deployer not found: Git,则使用命令 npm install hexo-deployer-git –save 即可。

热评文章